Twitch Stream Manager: Set Up a Professional Twitch Stream From Scratch
Most streaming guides either assume you already know OBS or overwhelm you with options you don't need yet. The Twitch Stream Manager covers hardware assessment, essential scene design, encoder and bitrate settings based on your actual internet speed, a pre-stream checklist, chat management during stream, and title optimization for Twitch discovery — giving you a professional setup without the technical overwhelm.
The gap between a stream that looks and sounds professional and one that doesn't comes down to about a dozen specific decisions — bitrate, encoder, mic gain, scene layout, alert timing. The problem isn't that the information doesn't exist. It's that it's scattered across a hundred different forum posts and YouTube tutorials that were written for different hardware, different use cases, and different years.
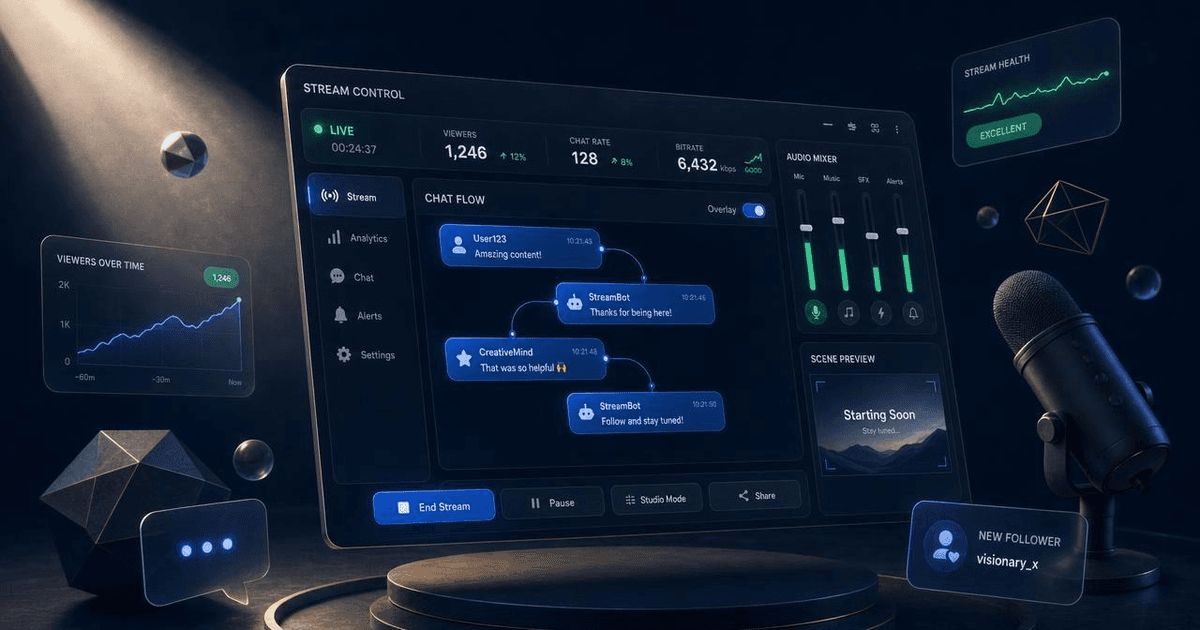
The Twitch Stream Manager is an installable AI skill for Claude and ChatGPT that walks you through the complete streaming setup as a conversation. Tell it what you're working with — your PC specs, internet speed, what game you're streaming, what software you're using — and it gives you settings, scene layouts, and a workflow built around your actual situation, not a generic setup that might or might not apply to you.
It covers OBS, Streamlabs, StreamElements, and Twitch Studio, and it works whether you're setting up for the first time or leveling up a stream you've been running for months.
Hardware Assessment: What You Actually Need vs. What to Upgrade First
The most expensive mistake new streamers make is upgrading the wrong thing. The Twitch Stream Manager starts with a hardware assessment to identify where your actual bottlenecks are.
The three things that hurt stream quality most:
-
Simultaneous GPU load — gaming and streaming at the same time puts a dual burden on your GPU. The skill explains when you can get away with GPU encoding (NVENC for Nvidia, AMF for AMD) versus when you need to use CPU encoding — and what the tradeoff looks like in practice. A good rule: if you're already GPU-bottlenecked in the game you're streaming, software encoding on the CPU will produce better stream quality even though it sounds counterintuitive.
-
Upload bandwidth — your internet upload speed is the hard ceiling on stream quality. The skill walks through what bitrate you can sustain at different internet speeds (allowing headroom so your upload doesn't spike and drop frames), and what that translates to in terms of achievable resolution and framerate. Streaming at 1080p60 at 6000 kbps requires roughly 8–9 Mbps of sustained upload to be stable. If you have 5 Mbps up, 720p60 at 4000 kbps is the better choice, not a downgrade.
-
Microphone clarity — after video quality, audio is what separates professional-feeling streams from hobbyist ones. The skill covers the most common audio mistakes: mic gain set too high causing clipping, no noise gate so keyboard and room noise bleeds in constantly, no compression so volume spikes are jarring, and bad mic placement. You don't need an expensive microphone — but you do need correct settings for whatever microphone you have.
The upgrade priority the skill recommends: internet speed first (if you're upload-constrained), microphone second (cheapest path to sounding better), then RAM if you're bottlenecking on memory, then a dedicated streaming PC if you're doing high-end production. GPU upgrades specifically for streaming are almost never the right first purchase.
Scene Design: What You Actually Need
New streamers tend to either add too many overlays or use none at all. The Twitch Stream Manager gives you the essential scene set that every professional stream runs — and explains what each scene is for and why it earns the screen real estate.
The five essential scenes:
-
Starting Soon — a holding screen that runs 5–10 minutes before you go live. Shows your logo, an estimated start time, and optionally a countdown. Tells early arrivals they're in the right place and sets expectations. The skill explains what information to include (and what to leave off — no alert spam before you've even started).
-
Main Game scene — your primary streaming scene. The skill covers the overlay layout question in depth: how much screen real estate your webcam should take (small face cam in the corner vs. large), whether a border/frame is worth it, which alerts you should actually show vs. suppress, and how to keep the overlay readable without covering important game elements.
-
BRB scene — what runs when you step away. Should loop something or show static information (your socials, a clip highlight, a video of your setup). The skill explains why going offline entirely when you step away is a mistake — it ends the stream session, loses your viewer count momentum, and disconnects chat.
-
Just Chatting / Face Cam scene — a talking-head scene for when you're not gaming. Useful for stream openers, game transitions, or Q&A segments. Clean background, larger face cam, less overlay clutter than the game scene.
-
Ending screen — runs for the final 3–5 minutes of stream. Promotes your socials, next stream date, and a clip or highlight from the session. Gives late arrivals somewhere to go after the stream ends.
Overlay guidance: the skill is direct about what's worth the pixels and what clutters the stream. Recent followers, donation alerts, and subscriber notifications are worth showing. Bit alerts below a certain threshold, hype train progress bars, and point redemption notifications almost always add noise without adding value for most streamers below 500 concurrent viewers.
OBS Configuration: The Settings That Actually Matter
The Twitch Stream Manager doesn't walk you through every OBS setting — it walks you through the ones that have a meaningful impact on stream quality and stability.
Encoder settings:
- NVENC (Nvidia) or AMF (AMD) for most streamers — hardware encoding uses dedicated silicon and barely impacts game performance
- x264 (CPU encoding) when you're GPU-bottlenecked or using an older card without quality NVENC support
- Recommended preset: Quality (not Performance or Max Quality — Max Quality is unstable for streaming)
- Keyframe interval: 2 seconds (Twitch requirement — the skill explains why this matters for viewer latency)
Bitrate by setup:
| Upload Speed | Target Bitrate | Resolution / FPS |
|---|---|---|
| 3–5 Mbps | 2,500–3,500 kbps | 720p30 or 720p60 |
| 6–10 Mbps | 4,000–6,000 kbps | 1080p60 |
| 10+ Mbps | 6,000 kbps (Twitch cap) | 1080p60 |
Audio configuration mistakes the skill flags:
- Desktop audio and mic on the same track — if you ever need to remove desktop audio from a VOD for copyright reasons, you can't; the skill walks through setting up separate audio tracks
- No noise gate — even a gentle gate set to trigger around -40dB removes keyboard, fan, and room noise without audibly clipping your voice
- Compression settings that are too heavy — heavy compression makes a voice sound flat and radio-compressed; the skill gives specific threshold/ratio recommendations for streaming (lighter than podcast compression)
The Go-Live Checklist
This is the repeatable pre-stream routine the skill builds around the five minutes before you go live. Running this checklist consistently eliminates the most common stream-ruining mistakes:
- Audio levels — check your mic in the OBS audio mixer, check your desktop audio is at the right level relative to your voice
- Scene check — verify Starting Soon scene is active, not accidentally showing a scene you didn't intend
- Title and category set in Twitch dashboard — not from last stream's leftover values
- Alert test — fire a test alert to confirm your alerts are triggering and your alert sound level is appropriate
- Social announcement — tweet or post that you're going live before you actually go live, not after
- Discord notification — ping your Discord if you have one
- Browser/Discord closed or in background — any application that makes notification sounds or pops up on screen will show up in your stream
The 5-minute window the skill emphasizes: go live 5 minutes before you plan to start playing. Run the Starting Soon scene, greet early arrivals, test audio in the chat, and make sure everything looks right while people trickle in. Starting cold — launching OBS and immediately being in game — leads to undetected audio issues that run for 20 minutes before someone tells you in chat.
Chat and Community Management During Stream
How you handle chat during stream has a bigger impact on growth than most streamers realize. The skill covers the dynamics that are easy to get wrong:
First-time viewers: acknowledge them when you can, but don't stop mid-game for every single new follower notification. The skill explains the difference between a good pace of chat acknowledgment (engaging without it interrupting the content) and one that makes the stream feel like it's constantly stopping for admin. A good rule: batch greet at natural pause points — between rounds, in a loading screen, during a menu — not during active gameplay.
Moderation bot setup: the skill walks through setting up Nightbot or Fossabot with the commands that actually matter — a !socials command, a !schedule command, an !uptime command, and a few game-specific commands if relevant. It also explains auto-moderation: what word filters are worth running, when to timeout vs. ban, and why the default "any link" restriction is usually overkill for small channels.
When to engage vs. stay focused: the skill is honest that you can't maintain the same ratio of chat engagement at 3 viewers vs. 300. It gives guidance on calibrating engagement density to where you are — leaning heavily interactive at small scale (chat-driven stream feels more like a hang than a broadcast), gradually shifting toward more performance-focused content as viewership grows.
Title and Category Optimization
Twitch discovery is driven by two things: category placement and title quality. The skill covers both.
Category selection: most streamers pick the obvious category for the game they're playing. The skill explains when a smaller adjacent category outperforms the primary one — if you're playing a large game with thousands of concurrent streams, you're invisible in the category. Browse time in a category of 500 streams is meaningfully higher than in a category of 5,000. Niche game variants, challenge runs, or Just Chatting adjacent categories can drive more organic discovery for small channels than competing directly with partnered streamers in the main category.
Title formats that attract viewers: the skill provides a title structure that converts on Twitch: specificity + context + what makes this stream different. "Playing Elden Ring" is invisible. "First time Elden Ring NG+ | Deathless attempt | !build in chat" tells a potential viewer what they're getting, signals interactivity, and uses the title space to communicate.
How to Use It
Install the Twitch Stream Manager as a Claude skill or ChatGPT Custom Instruction. Start with your setup specs:
"I have a PC with an RTX 3070, Ryzen 5 5600X, 16GB RAM, and 15 Mbps upload speed. I'm streaming Valorant in OBS. Help me set up my encoder settings, scenes, and go-live checklist."
Or for a setup audit:
"I've been streaming for 3 months. I'm getting dropped frames occasionally and I think my audio sounds inconsistent. Here are my current OBS settings: [paste]. Help me diagnose and fix this."
Pricing and Where to Get It
The Twitch Stream Manager is $7, one-time. Works in Claude and ChatGPT — no subscription. Install it once in a Project or Custom GPT and use it every time you change your setup or troubleshoot a stream issue.
→ Get the Twitch Stream Manager
Pair It With
- Twitch Clip & Highlight Generator — once your stream is set up and running consistently, this skill builds the workflow to turn your best moments into a week of short-form content.
- Community Comment Responder — for managing audience engagement across your social platforms between streams.
- Content Repurposing Planner — plan how your stream content feeds your entire content calendar across TikTok, YouTube Shorts, and social media.
Get More Skills Like This
The Twitch Stream Manager is part of the Content Machine — a curated set of 28 AI skills for high-output creators who need to produce more without burning out. If you're running a streaming operation and want every production piece handled, the bundle saves you 85% vs buying each skill individually.
A great setup doesn't make you a great streamer — but a bad one will hold you back even if everything else is right. Get the technical foundation right once, and you can focus on what actually grows a stream: showing up consistently and giving your audience a reason to come back.
If you're still building that initial audience, read How to Grow on Twitch in 2026 for the tactics that get you from zero to your first 100 loyal viewers.
About the author
Content, CreatorSkills
The CreatorSkills team publishes practical guides on AI workflows for content creators.
About CreatorSkills